
Blessing of Deathwing & Curse of Deathwing
The Deathwing dungeons drop Blessed and Cursed Fragments, used in the crafting of Blessed and Cursed Armor. Both dungeons use the same map with the same layout. The core difference is that Blessed Deathwing has resistance to Magical Damage and Cursed Deathwing has resistance to Physical Damage.
Both Deathwing dungeons feature 3 totems that must be destroyed to spawn the boss.
An easier way to think about the dungeons is:
Physical Damage --> good in Blessed Deathwing
Magical Damage --> good in Cursed Deathwing
Be careful when teleporting into the boss room. You can't see inside the room, and players can oftentimes teleport into a pattern without having time to react. It's recommended for this reason that the tank pulls the boss to the opposite end of the arena before everyone else joins.
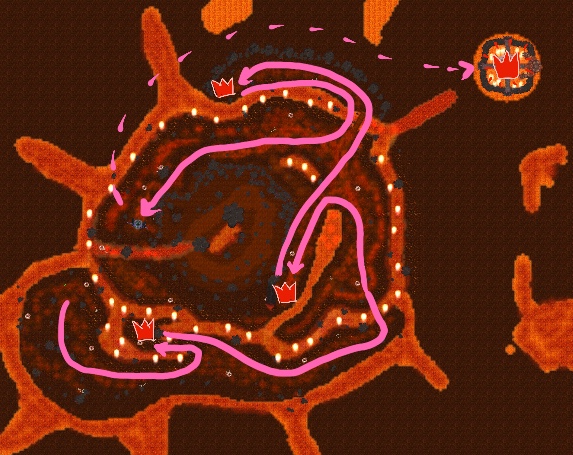
The one route clear of Deathwing simply takes a route to all three totems, with some minor backtracking at each totem.
While all the enemies are along the way, the paths are quite wide and it can be very easy to miss enemies, or frustrating to run back and forth. It's recommended to split the path with the party to cover the entire path and clear in one pass.
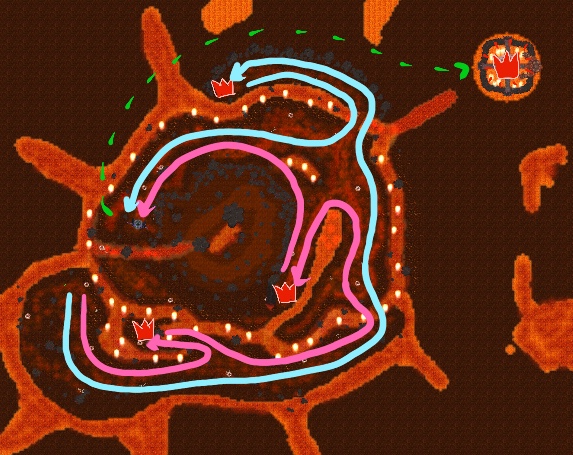
The two route clear of Deathwing speeds the dungeon up by reducing the amount of backtracking. One group takes the inner two totems, while the other group takes the outer totem. By hugging their respective sides, the party can full-clear the dungeon with relative ease, meeting at the teleporter to the boss room.
Don't teleport into the boss room before your other party members arrive! The boss room is relatively tight and Deathwing might start attacking you the moment you teleport in.
Last updated